
GETTING STARTED / GUIDE 1 OF 2
Prepare your Windows installation USB
Choose your Windows source, prepare updates, and create a USB installation drive.
Click a screenshot to enlarge it. Appearance and available options can vary by version and computer.
Download and open SWITCH
Download the SWITCH ZIP, then right-click it in File Explorer and choose Extract All. Open the extracted SWITCH folder.
Double-click SWITCH.exe beside the App folder. No installation is needed. Keep the complete extracted folder together when moving it.
You can prepare the USB on a different computer from the one that will receive Windows.
Choose Windows and your customizations
Select the Windows version you want. Home or Pro is selected later, when installing Windows on the destination computer.
Open Customizations and choose a category. Select the intended value for each setting, or Leave unchanged to skip it, then choose Save choices. Choose Performance, Security or Basic Windows Settings as your starting point, or Load Profile and Save Profile to reuse your own settings.
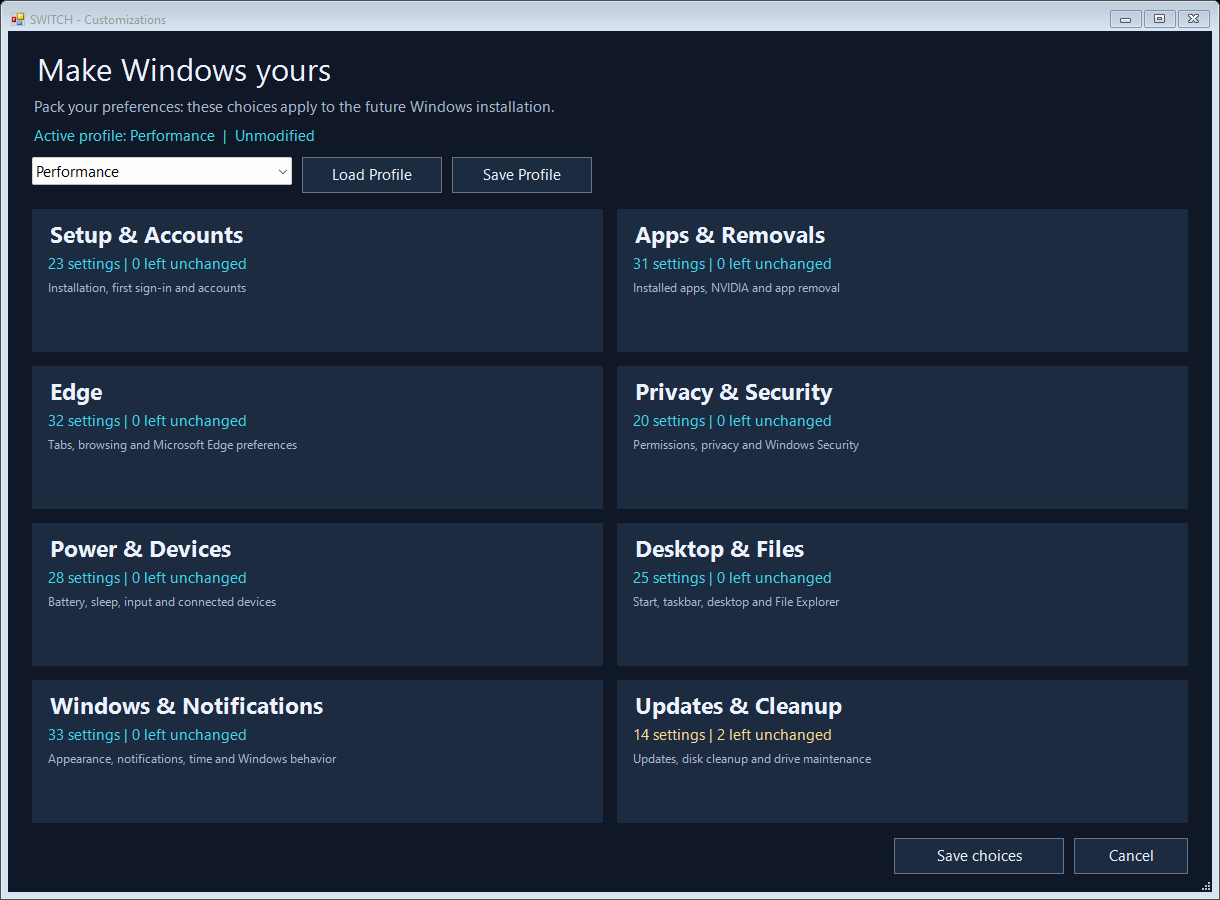
Download the Windows installation files
Choose Direct Windows ISO Download, then Download Windows ISO. If you already have a compatible Windows ISO, choose the import option instead.
Wait for downloads and update preparation to finish. Allow space for the ISO and temporary working copies, which can exceed 100 GB. Future refreshes reuse unchanged files.
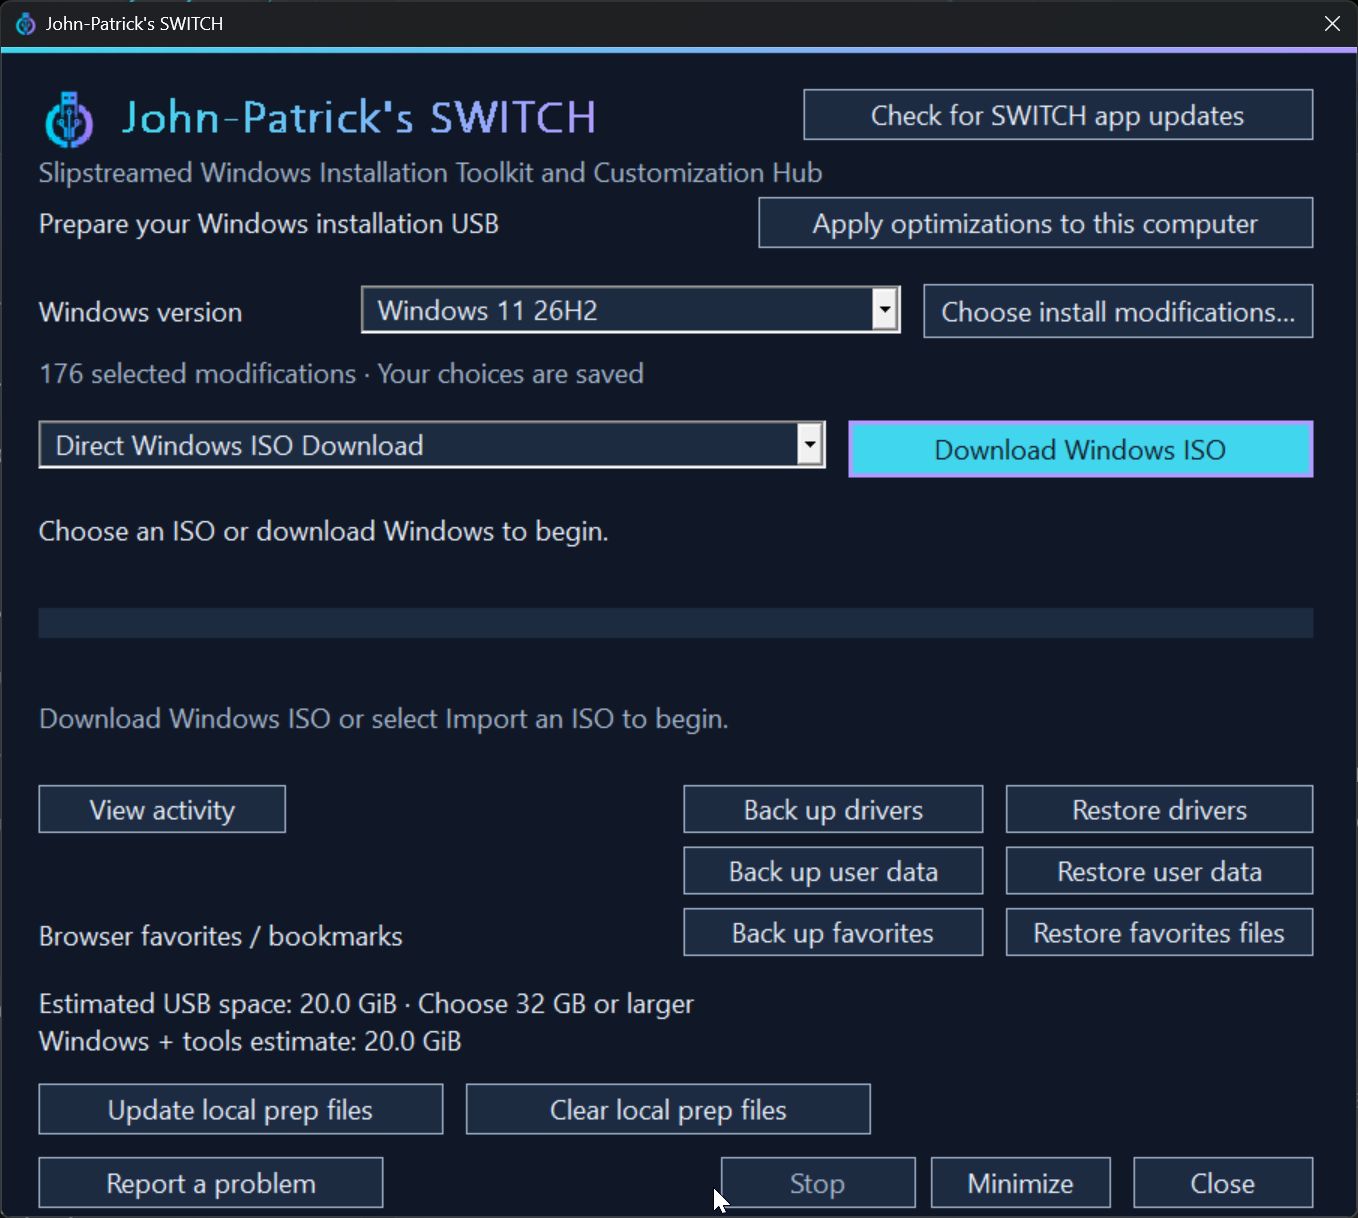
Prepare the USB drive
Connect a USB drive with enough space. Start with 32 GB or larger; driver and personal-file backups may need considerably more. Check the capacity estimate in SWITCH.
Copy anything you want to keep elsewhere first. Check the drive shown in the confirmation before accepting.
When the files are ready, choose Prepare USB drive and confirm the correct drive. Preparation continues through the remaining steps automatically. Wait for SWITCH to report completion before removing it.
The USB is now ready for the backup and installation workflow below.
Need help? Choose Report a problem in SWITCH to prepare a description and diagnostic logs, or email admin@jpswitch.com.